

Got a Question? Contact me at enquiries@virtualfrontiers.co.uk
Controlling RaspBMC with an IR Remote Control
The last thing needed to make this a true Living room style media device is the ability to control it with a standard IR remote control rather than a bulky mouse and keyboard setup. Fortunately the procedure is remarkably pain free.What You Need
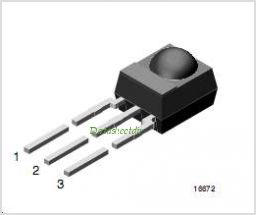
1. A Raspberry Pi with RaspBMC already installed 2. A terminal prgram such as PuTTy 3. An IR module 4. A breadboard and jumper wires OR jumper wires with male and female connectors if you want to wire direct from the Pi to the IR module. You can get the IR module fairly easy from eBay. I bought two for the princely sum of £2.55 inc. P&P so i had a spare in case something blew up. The module I got was a TSOP4838. Pin 1 is the Signal line. Pin 2 is the Ground line pin 3 is Power Most other compatible modules follow the same three pin layout but the numbers may be different. if you have a different module and are unsure of the layout a simple Google search should bring up the relevant datasheet for your device.Connecting The IR Module To The Pi
So amazingly simple even i got it right first time!1.
Connect the Signal pin to a GPIO pin. By default the IR software in the Pi defaults to pin 18. unfortunately GPIO
18 on my Pi was in use for the LCD Display so i connected it to GPIO 11 instead
2. The Ground pin connects to any of the Ground pins on the Pi. 3. Connect the Power Pin to one of the 3v3 pins on the Pi (Do not connect to the 5V pin) That’s it! Note: Your module will probably state it is powered by 5V and you will be tempted to connect the power to the 5V pin. Don’t do this, it works better off the 3v3 pin.Configuring the Pi
The software for controlling the IR module, called LIRC, should be already installed as part of the RaspBMC build but for testing purposes, we are going to turn it off for now. 1. In OSMC, go to Settings> My OSMC 2. Select the Pi Config Section 3. Go to the Hardware tab 4. Ensure that Enable GPIO TSOP IR Reciever is enabled. 5. There are two sections ofr the in pin and the out pin. We are only interested in the In pin as we are not using an IR blaster to control other devices. Change the In pin setting to match whichever pin you wired your IR receiver to then slect OK That’s pretty much it for setting up the hardware. It’s much simpler than in the previous RaspBMC which required some mucking around in configuration files and boot modules!Configuring OSMC
This bit can either be really easy or fiendishly complicated, depending on the remote control you want too use. I have a One-For-All remote you can pick up at any electrical retailers. It's one of those programmable remtoes that can handle multiple devices. I programmed the media centre option for a standard Microsoft MCE remote This was the best option for me as this remote also controls my TV, my Blu-Ray player and my amplifier, so adding one more function made more sense. If you have a remote you want to use, you can use the 'irrecord' command to record the keypresses on your remote and assign them to specific functions. I am not going into the process on how to do that. I've done it once and I still have nightmares about it. There are several custom configuration files for variuous remote control types so choose whichever one you have. 1. To enable the remote control in OSMC, perform the following steps: 2. Navigate to Settings> My OSMC 3. Select the remote type. in my case, I used 'RC6” 4. if you have generated your own controller codes using the irrecord function, select "Custom (lircd.conf)' 5. Select OK Congratulations! You should now be able to control your Pi with your IR remote control